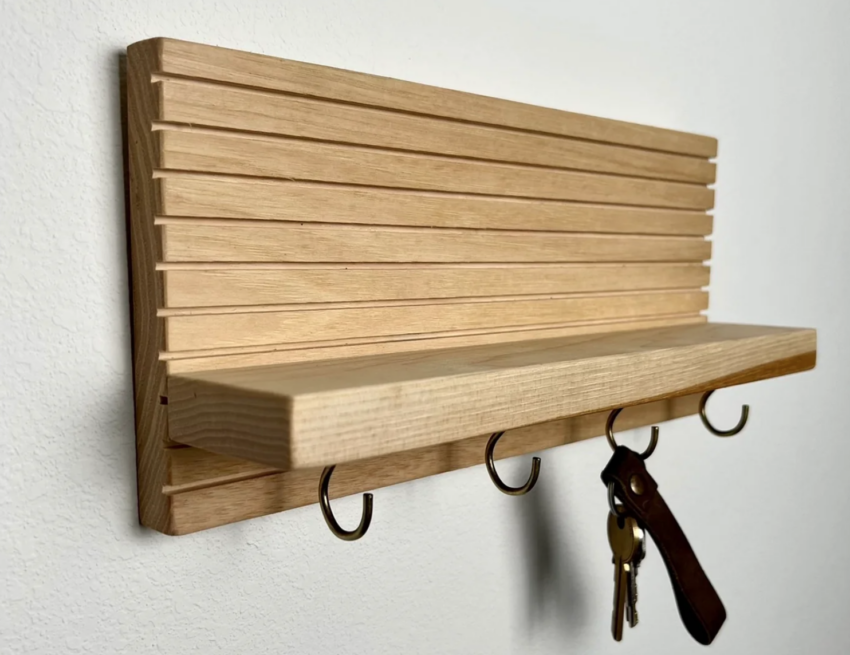
Here’s a blog post about a simple DIY key hanger project for your entryway:
DIY Entryway Key Hanger: A Simple Solution to Keep Your Keys Organized
Do you often find yourself rummaging through bags or pockets to find your keys when you’re in a hurry? A designated key hanger in your entryway can be a game-changer. This simple DIY project is not only functional but also adds a touch of style to your space. Best of all, it can be completed in less than an hour with minimal materials. Let’s get started!
What You’ll Need:
- A small wooden board (approximately 12 inches long and 4 inches wide)
- 3-4 decorative hooks (available at any hardware store)
- Sandpaper
- Paint or wood stain (optional)
- Paintbrush (if painting or staining)
- Screwdriver or drill
- Screws or wall anchors
- Measuring tape
- Pencil
Step 1: Prepare Your Wooden Board
Start with a clean, smooth wooden board. If the edges are rough, use sandpaper to smooth them out. This will give your key hanger a polished look and prevent any splinters. If you want to add some color or protect the wood, you can paint or stain the board now. Let it dry completely according to the product instructions.
Step 2: Plan Your Hook Placement
Decide where you want to place your hooks on the board. Using a measuring tape and pencil, mark evenly spaced spots for each hook. For example, if you’re using four hooks, you might space them 3 inches apart starting from the left side of the board. This ensures your keys will hang neatly and won’t overlap.
Step 3: Attach the Hooks
Once your marks are in place, it’s time to attach the hooks. If your hooks came with screws, use a screwdriver or drill to secure them into the wood at the marked spots. Make sure they’re tight and sturdy so they can hold the weight of your keys.
Step 4: Mount the Key Hanger
Find the perfect spot on your entryway wall—ideally near your door for easy access. Use a measuring tape to ensure it’s level. Mark the top corners of your board with a pencil. If you’re mounting on drywall, you may need wall anchors to ensure the board stays secure. Drill pilot holes, insert the anchors if necessary, and then screw the board to the wall.
Step 5: Test It Out
Hang your keys on the hooks and admire your handiwork! You can also add labels or small tags to each hook if you have multiple keys (e.g., house, car, office) to keep things extra organized.
Customization Tips:
- Add a personal touch by painting the board in your favorite color or using decorative hooks shaped like animals, hearts, or other fun designs.
- Attach a small shelf above or below the hooks to hold mail, sunglasses, or other small items.
- For a rustic look, consider using reclaimed wood and brass hooks.
Why It Works:
This simple DIY key hanger keeps your keys in one convenient spot, saving you time and frustration. It’s also a budget-friendly project—most of the materials cost less than $20, and you likely already have some of the tools at home. Plus, it’s a satisfying way to add a custom, handmade element to your home.
So, next time you walk through your entryway, you’ll know exactly where your keys are. Happy crafting!

